


Surfaces only appear in 3D plots for rather obvious reasons. SVAR can create two types of surfaces: either as planes or as irregular or rounded shapes. The planes have usually been constructed with the intent of showing some limit value, like a slice of likelihood function, while the likelihood function itself is likely to be somewhat irregular! Plane surfaces don't have any context menus by themselves other than a "Cut" item when they appear as the only surface in an axes object.
|
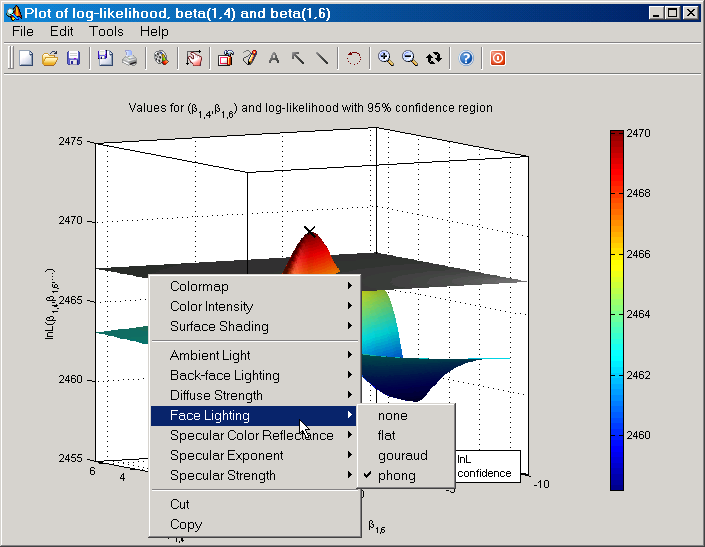
Figure: The context menu for a 3D surface in SVAR. |
The items on the context menu of the more general surface objects are as follows:
| • | Colormap: Allows you to select a new colormap for the whole figure. The default map in color mode is called "jet" and "gray" in black-and-white mode. The color modes are selected on the Graphics tab on the Preferences dialog. On the surface context menu you can between 17 different colormaps. |
| • | Color Intensity: Change the intensity of the selected colormap. You can choose between brighter, darker and undo. The latter item reverts the colormap back to its original state. |
| • | Surface Shading: Change the shading of the surface object. You can select from 3 possibilities: faceted, flat and interpolated. The last option gives you the "best looking" surface, but it also requires more computer memory as well as making the file size of a saved surface plot larger. |
| • | Ambient Light: Change the ambient light strength. You can choose between values ranging from 0 to 1, where 1 means brighter. |
| • | Back-face Lighting: Controls lighting of surface faces pointing away from the position of the light object. You can choose between lit, unlit and reverselit; see Light Context Menu and 3D Editing Tools for details on light objects, positioning of these, etc. |
| • | Diffuse Strength: Change the intensity of diffuse light. You can choose between values ranging from 0 to 1, with higher values giving more diffuse light. |
| • | Face Lighting: Change the method used to light faces. You can choose between none, flat, gouraud and phong. If you don't remember what the latter two options mean, recall that gouraud lighting implies that the effect of light objects is calculated at the vertices and then linearly interpolated across the faces. At the same time phong implies that the effect of light objects is determined by interpolating the vertex normals across each face and calculating the reflectance at each pixel. Phong lighting generally produces better results than Gouraud lighting, but takes longer to render. |
| • | Specular Color Reflectance: This property can be set to values between 0 and 1. When this property is 0, the color of the specularly reflected light depends on both the color of the object from which it reflects and the color of the light source. When set to 1, the color of the specularly reflected light depends only on the color or the light source (i.e., the light object Color property). The proportions vary linearly for values in between. |
| • | Specular Exponent: Change the harshness of specular reflection. This property controls the size of the specular spot. Most materials have exponents in the range of 5 to 20. Values between 1 and 50 can be selected from the context menu. |
| • | Specular Strength: Change the intensity of specular light. This property sets the intensity of the specular component of the light falling on the surface. Specular light comes from light objects in the axes. Values between 0 and 1 are available where higher values means higher intensity. |
| • | Cut: Deletes the surface from the axes object. If it's the only surface (planes not counted) it will also remove any colorbar connected to the axes object. |
| • | Copy: Copy the surface data into the internal SVAR "Clipboard". Makes it possible to paste it into any axes object; see Axes Context Menu for details. |